Wednesday, September 18, 2019

When too little fabric is enough - piecing pattern pieces


Earlier this summer I bought a piece of beautiful printed linen in the Seasalt sale -  a bargain at 3 metres for £19.95 instead of £55. I thought of all sorts of things I could make with it but in the end decided to keep it simple and make a Dress No2 by 100 Acts of Sewing because it's a pattern that works for me and I knew I'd love it.
It was lovely wide fabric and after making my dress I had well over half a metre left to do something with. There was no way I could bear to waste it.

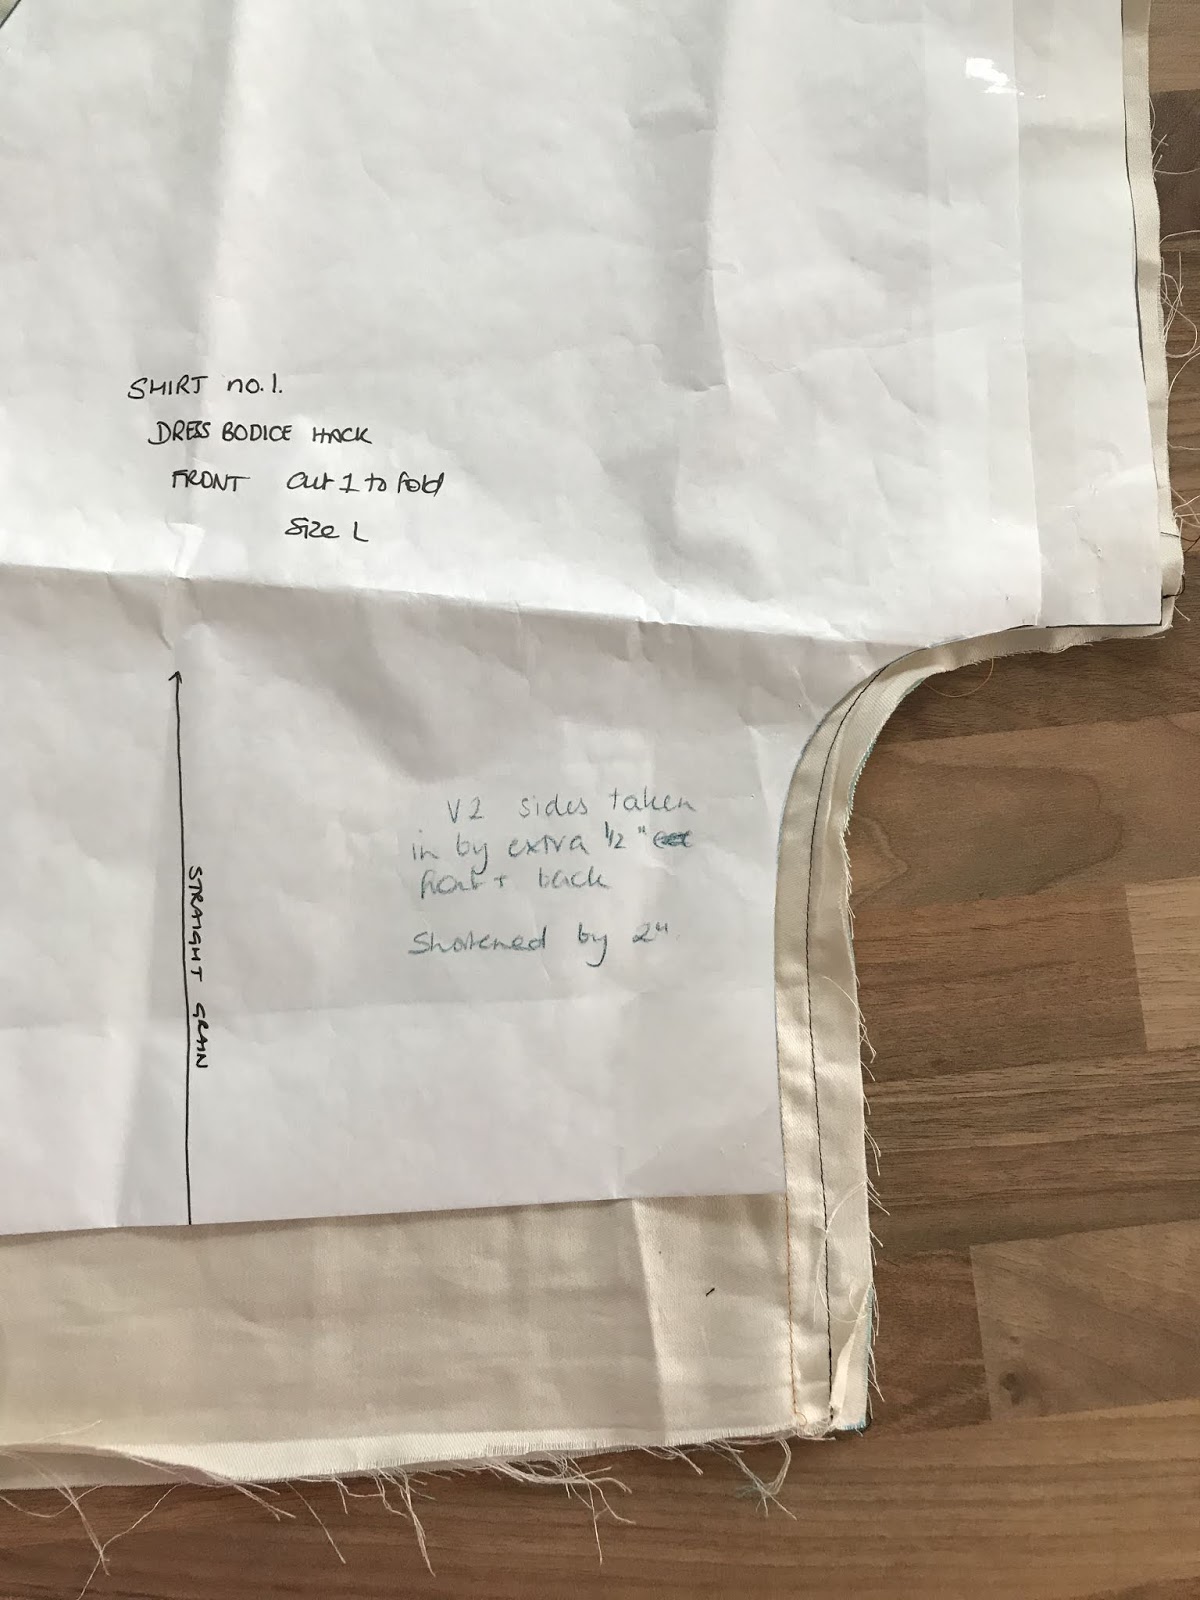
 Again I looked at all sorts of patterns but it wasn't quite enough to make any of them so I turned again to my 100 Acts of Sewing patterns and yet another Shirt No1! 


This pattern is made with just two pieces, a front and a back, placed on the fold of the fabric for cutting out. I knew I had enough fabric to make the shirt but not enough to cut the two pattern pieces on the straight grain in whole pieces.
I decided the only way to go was to make the back in two pieces. I had enough to cut over half of the back to the fold, on the straight grain, but then cut the remainder for the bottom of the back piece on the cross-grain, just adding in a half inch seam allowance on each piece. I then pressed the seam towards the hem and top-stitched 1/4" from the seam to make a feature of the piecing.


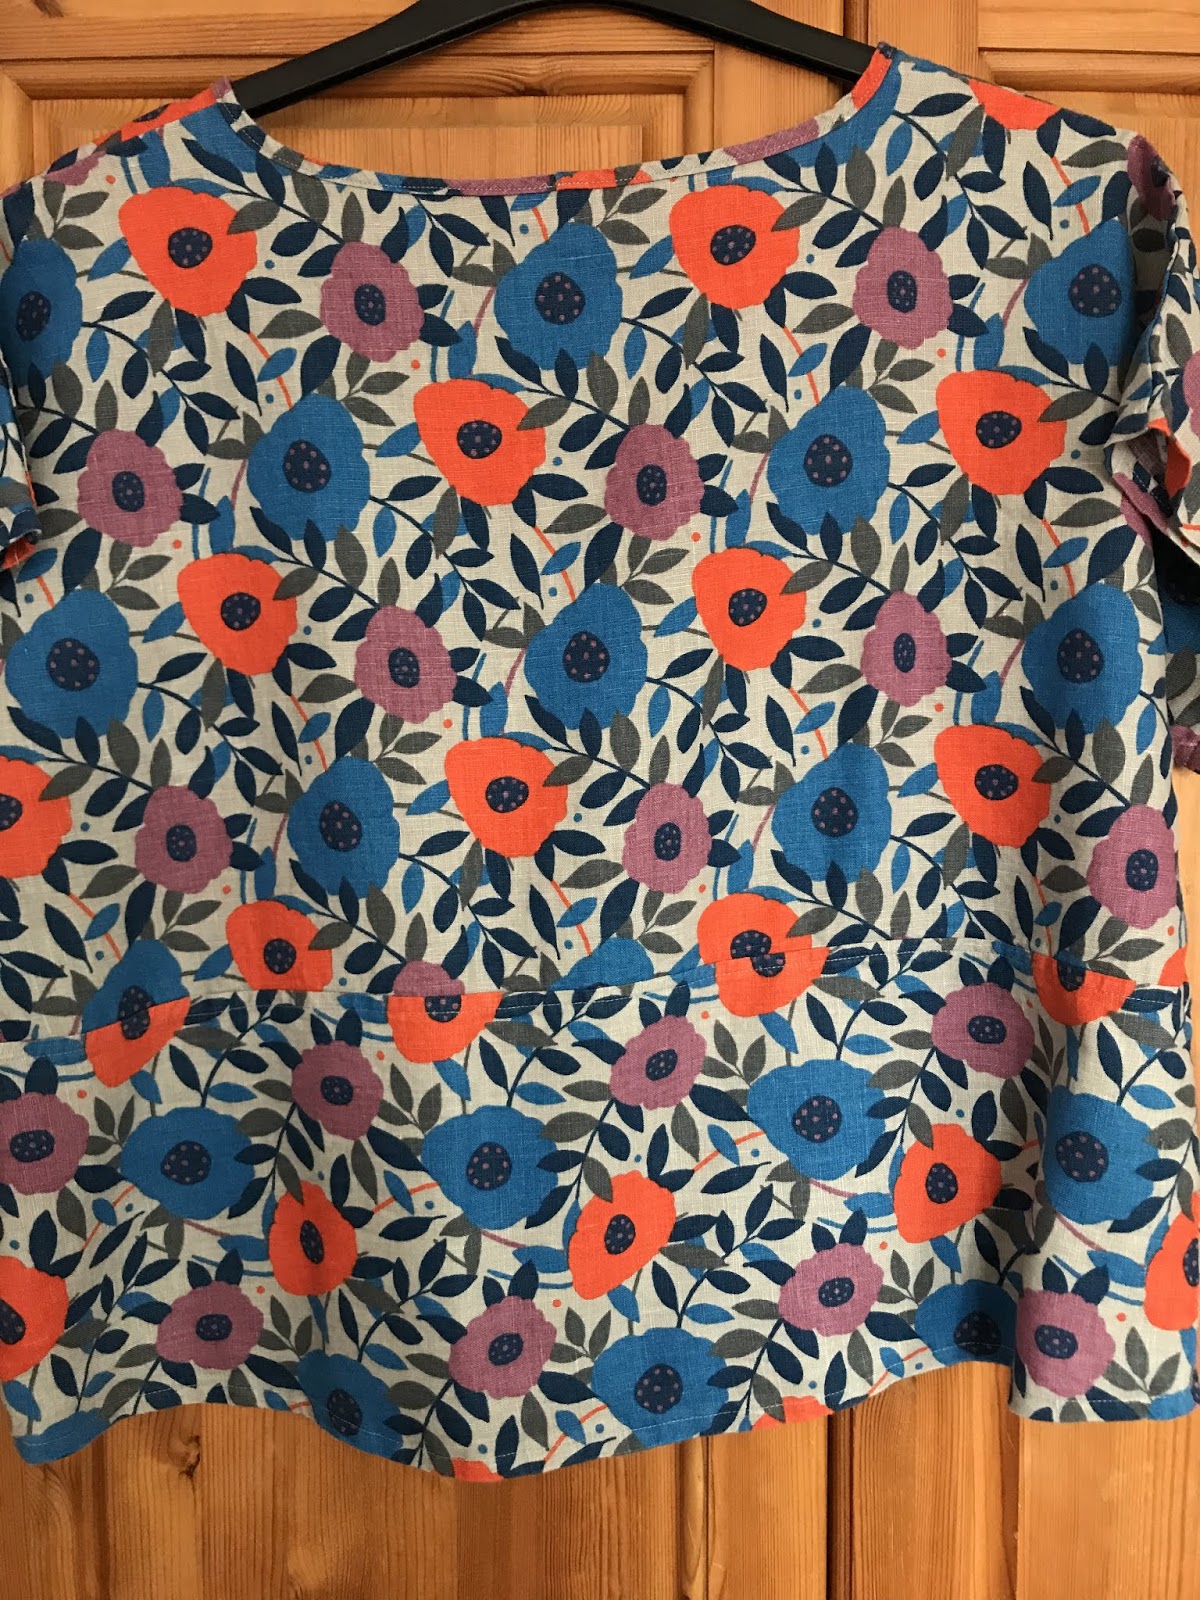
The combination of a lovely simple pattern and a busy patterned stable fabric meant it worked like a dream and as it's on the back I don't even have to see it!


Having done this once it was a matter of time before I tried piecing my fabric again.

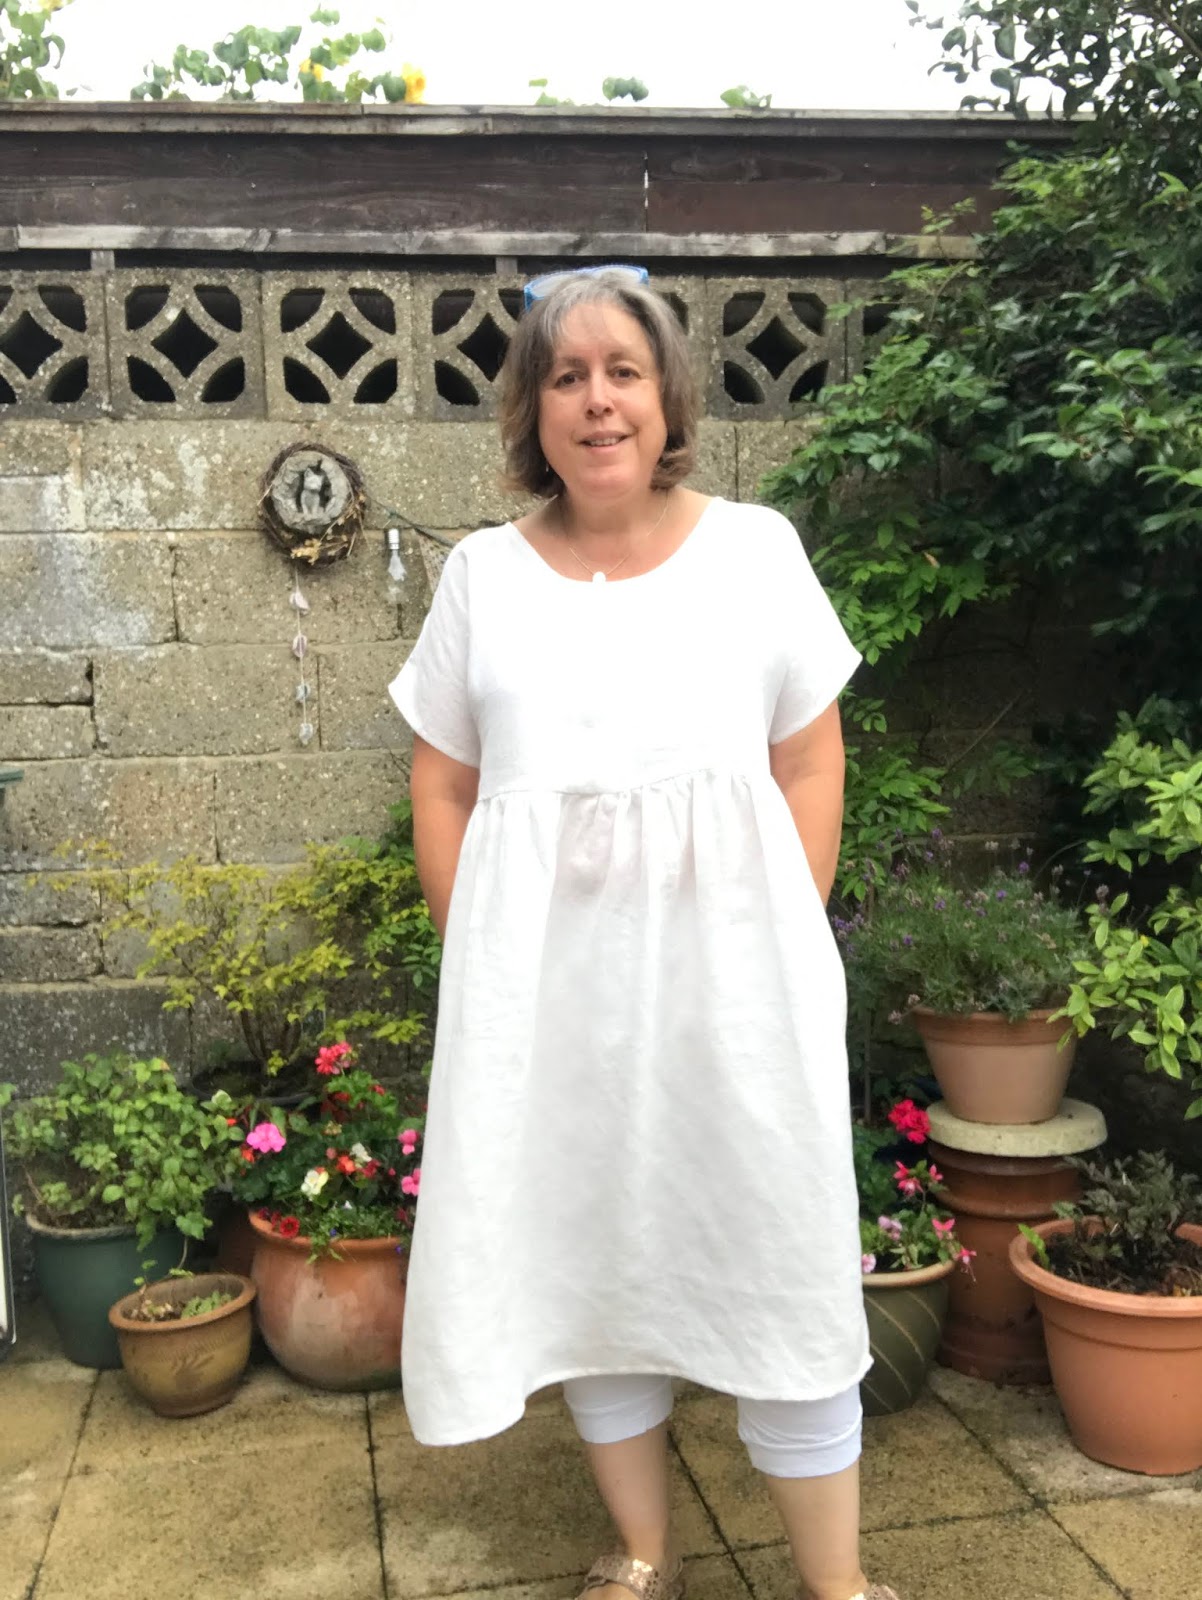
So when my girl bought me three beautiful 2 metre lengths of cotton fabric back from her holiday in Australia this summer I was determined to make the very most of it. One of those fabrics was a gorgeous Kookaburra print in rusty autumnal shades. It's a quilting cotton so only 44"(114cm) wide.

I'd already made a sleeveless Dress No1 out of one piece of Aussie fabric but decided to have a go at squeezing a Dress No2, with sleeves, out of the Kookaburras. The pattern calls for 2.75m of fabric with a width of 114cm for a size L and I had 2m exactly.

I was determined to give it a go and it worked, just, with a bit of nifty piecing!


Cutting the front and back to the fold was no problem but there wasn't a piece big enough to cut the sleeves whole so I pieced them roughly half way down the upper arm, squeezing the lower arm pieces, pockets and neck binding out of the rest of the fabric.


Again, just adding half an inch seam allowance to each sleeve piece, pressing the seam towards the upper arm and top-stitching the seam to make a feature out of it worked beautifully. Being a very busy print it's barely noticeable when I'm wearing it.


The simplicity of these patterns lends them brilliantly to piecing and I'm planning a colour blocked Shirt No1 at some point but for now I have another pieced Dress No2 cut from a 1.5m Seasalt remnant from eBay waiting to be sewn together!


Happy sewing!


Friday, July 19, 2019

Shirt No 1 Dress Hack


I knew there had to be a reason not to close my poor old blog and this is it. I've given it a new name and a quick revamp and am going to use it to post my garment sewing exploits.

 On 14th April this year I finally plucked up courage to have a go at sewing a garment and that garment was Shirt No1 by the brilliant Sonya Philip at 100 Acts of Sewing. I bought my pattern      from Beyond Measure, the only UK stockist of Sonya's wonderful, simple yet fun and very         wearable patterns.

I then went on a two month spree of making all the Shirt No.1s until on 16th June I felt brave enough to try my first ever pattern hack, making the shirt pattern into a simple gathered waist dress.

I'm now going to do a run through of how I did it.

Using a pattern hack I found on Pinterest by Elise and my original tracing of the Shirt No.1 pattern, that I've now used for 13 versions of the top (!), I made up a very quick toile out of a scrap of curtain lining.
This bodice was six inches shorter (measured up from the hem along the fold line) than the original pattern tracing seen below, I took it in 1.5" at each side seam as per Elise's hack, did a slightly deeper scooped front neck and omitted the curved hem.

My Original tracing of the Shirt No.1 Pattern

Curtain lining bodice toile
Thinking this was perfectly okay in terms of length, and width because I'd already taken it in a lot, I went ahead and made up a version in a leftover piece of chambray, adding a simple gathered skirt using Elise's suggested measurements but with 2" added to the length.


However, it was soon obvious that the top was far too wide, too long and the skirt was too short for me. I'm still going to wear this to garden or do housework in but it's not going out in public!

So, back to the drawing board and I took another half inch off each side seam of the toile and pinned it up by 2" to see how it looked. It already looked much better, even if it was a bit of curtain lining worn inside out!

Side seam adjustment on bodice toile

For my third attempt I unearthed a grey linen Ikea curtain that I bought from Southampton Scrapstore ages ago. This local recycling charity is an amazing resource for the fabrics that I use to make my bags for my Etsy shop and every now and then something suitable for garment making pops up.

Version 3 turned out to be far more successful. An actual wearable toile. Also very popular on Instagram, getting more likes than anything I've posted on there in over five years!

Version 3 - my first wearable toile of this hack


I've since worn this out in public, while on holiday in Cornwall, and no-one laughed or pointed!
It was also incredibly cool and comfortable on a very warm and sunny day.
So, in case you've found all that tricky to follow, here's exactly what I did:

The Bodice

 Eight inches shorter than original Shirt No.1 pattern, measured up from hem and along fold line, bottom hem cut straight across, omitting the curved hem of the original.

Bodice side seams taken in by 2" from original Shirt No.1 pattern.

Scooped neck based off a shop bought summer top that I like.


Skirt:

Cut two pieces 36" wide and 27" long. (I made a pattern piece 18" x 27" and placed it to the fold of the fabric). N.B. for me that is 1.5x my hip measurement which, having big hips, gives me just enough gather without too much fullness across my widest part - if you have smaller or bigger hips it may be worth just mulitplying your hip measurement by 1.5 to get a similar look to my dress.

Add in-seam pockets if wanted - I used a pocket from a tutorial by Sonya Philip for the Pants No1 pattern on Creative Bug and placed them 5.5" down from the top edge of the skirt

Sew pockets and side seams.

Do two rows of gathering stitches along the top edge of the front and the back of the skirt. I did the front gathering completely separately to the back which made it much easier to actually gather evenly once I was attaching it to the bodice.

Additional info:

I used half inch seams throughout as per the pattern instructions.

The bottom hem is done in exactly the same way as the Shirt No.1 hem, although I may do a deeper hem next time to give it a bit more weight.

Just in case it helps, I'm 5ft 3" and a UK size 16 top and 20 bottom..... and I cannot believe I just said that out loud on the internet!

Hope you enjoyed reading that and I hope it was useful. Here's Version 4 that I sewed up last night, using another Ikea linen curtain from the Scrapstore!


love Moogs xxx